


Smartphones
Smartphones

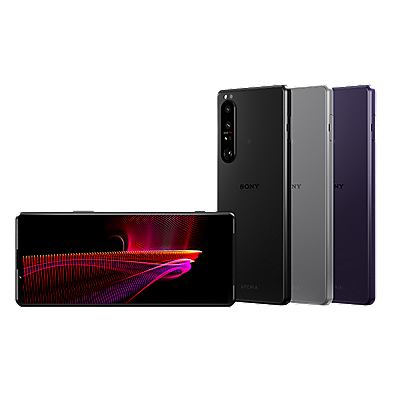
Xperia 1 VII
Xperia 1 VII Video Creator Video Text Transcript
Xperia sound effect.
Video Creator is an app that makes it super easy to create short videos with music and clips.
This video will show you how to use the "Auto edit" function for beginners, along with some more advanced editing like filters, adjusting colours, and adding text.
Let's start with "Auto edit”.
First, launch the app and tap "New project”.
Next, select the photos and videos, even including slow motion movies you want to use from your phone's storage.
Keep in mind that the order you select here will also be the order in the actual video.
When you're done, tap "Auto edit”.
Next is basic video settings.
"Duration" sets the total length of the video.
Select the number of seconds.
The app will automatically make each clip longer or shorter to fit your selected duration.
"Music" sets the background music.
You can choose your favourite track or let the app pick one for you.
When you're done, tap "Start”.
The app will instantly create a short video with music and your selected clips.
Pretty simple, right?
If you're not satisfied with the results, go back to "Auto edit" to readjust the settings.
If you like what you see, tap "Export”.
The finished video will be saved in Google Photos.
It's super easy to share your video with your friends or social media followers.
Just tap "Share" and follow the steps.
Next, let's try some more advanced editing.
What if you want to extend one of the clips in your video?
Tap on the clip and drag the slider to the left or right to change the length.
If you want to split a clip into two scenes, select one of the scenes and tap "Split”.
You can also drag clips to change the order.
If you want to rotate a clip, select it and tap "Rotate" to flip it around.
How about adding some text?
Just pause the video where you want to insert the text and tap "Text" in the editing menu.
Then, input the text and tap "OK”.
You can also change the font and colour.
Next, let's see how to add and edit the music.
If you want to add another track, tap "Music" on the editing screen.
You can choose a preset track or one stored on your device.
Browse preinstalled tracks from the "Preset" tab and tracks on your device from the "Local" tab.
If you want to adjust which part of the track to use, tap the track and drag the slider to the left or right.
You can also move the whole track by dragging it.
To make the original audio of a clip louder or softer, tap on the clip and then tap "Volume" in the editing menu.
Adding the original sound can really make your video stand out!
Let's move on to editing colours.
To add a colour filter, tap on a clip and then tap "Filter" in the editing menu.
You can make finer adjustments like exposure and contrast from the "Adjust" tab.
We're almost done.
Let's have a look at the aspect radio.
Tap "Aspect ratio" in the editing menu.
This is the ratio of the width of the video to the height.
You can choose your preferred aspect ratio from the ones displayed here.
Last, if you want to change the resolution or frame rate of the video file, tap "Export settings”.
"Resolution" sets the size of the video file, and "Frame rate" sets the number of frames per second.
Now, you're all set to use Video Creator.
Thanks for watching!
Motion logo
To film in Pro video mode, swipe left and go to Pro Video mode. To change the filming mode, tap the icon in the top left corner to switch between Program auto (P), Shutter speed priority(S), and Manual exposure(M).
The exposure, shutter speed, and ISO settings can be adjusted by tapping at the bottom of the display.
If you wish to zoom in and film a video, tap on the lens toggle, then tap again and drag to adjust the focal length / zoom scale to your liking.
Tap "Fn" to display the function menu, from which you can fine-tune the frame rate, microphone settings, Eye AF, and more.
As with other modes, you can use the Creative Look function in Pro Video mode, allowing you to choose your preferred color balance from the six Creative looks plus S-Cinetone for mobile.
For even finer control, tap on the menu button to access and adjust advanced settings in each category.
The current settings are shown at the top of the display, so you can check them at any time while filming.
An audio meter is also displayed, so you can check the audio level from the microphone. External microphones are also supported. Tap "DISP" to show or hide the spirit level and histogram.
You are now ready to start filming. Focus the camera on what you want to film and press the record button on the screen or the shutter button on the side of the Xperia to start recording.
If you want to pause recording for a moment, press the pause button. Press it again to resume recording. You can also take a snapshot by pressing the white button next to the pause button.
The new Xperia camera app enables everybody from beginners to professionals to easily shoot using their desired settings.
This app will allow you to easily shoot in a variety of different situations.
Discover the settings that suit you best and enjoy a great experience with the Xperia camera.
Thanks for watching.
-
Xperia 1 VII 256GB
256GB -
Xperia 1 VII 512GB
512GB